Amiga 500 – Fun With Storage
NB: In writing this post, I realised it's effectively a mini review of the ZuluSCSI…
I own many Commodore Amigas, and most of them actually work. On one of my Amiga 500s, I've been recently trying to get a decent SCSI hard disk drive working via a GVP Impact II A500-HD+ sidecar expansion unit.
This expansion unit contains a GVP SCSI controller, an internal 50-pin IDC connector for an internal SCSI drive and a 25-pin D-sub connector on the back for any external SCSI devices I may want to connect. It also has four 30-pin SIMM sockets, which I have populated with four 1MB SIMMs, providing an additional 4MB of FAST RAM to the A500.
The GVP is separately powered with its own 12v+5v brick-style PSU – more on that later.
Here is the Amiga in question on my workbench. The eagle-eyed among you will see where I am going with this post.
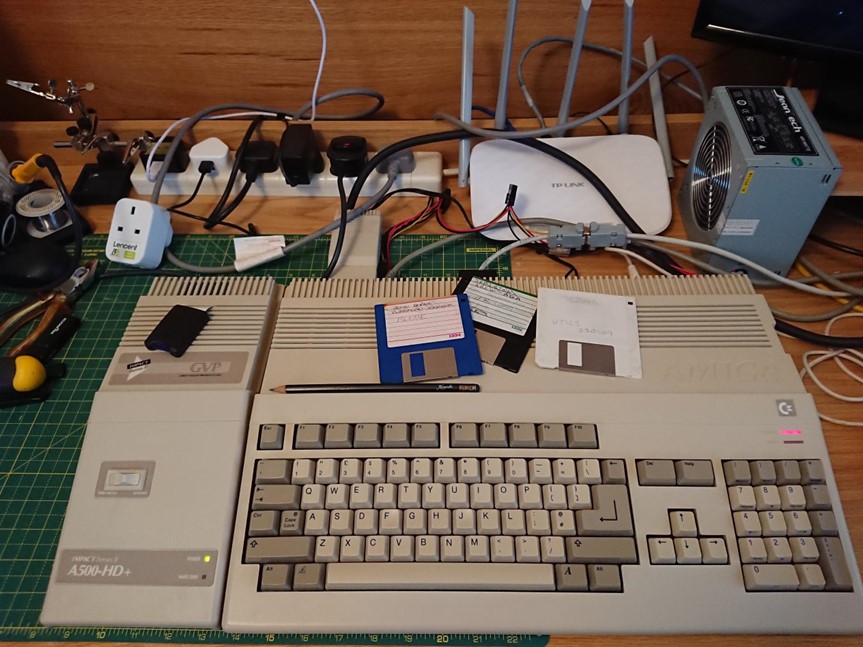
(Side note, even though that looks like an A520 RF-Modulator sticking out the back, it has actually been gutted to just provide RGB signals to a SCART cable. I keep meaning to print a new case for it, but never get around to it!)
I've had this sidecar SCSI unit for some time. It came with a measly 42MB SCSI Hard Disk, which, although suitable if slightly on the small size for the early 1990s, is way too small in capacity for all the things I want to install on this Amiga 500.
Now, I'm a stickler for trying to keep things period correct. This A500 came with Kickstart v1.3, and although I could put newer ROMs in it, I am not going to (I have other Amiga models for that). So, although I am aware of A500IDE type ROM upgrades and all those fancy TerribleFire cards etc., they are just not for me. I want this Amiga to boot from the GVP, and I want the GVP to house a larger disk (up to the supported size of the GVP SCSI ROM, and FastFileSystem for Workbench 1.3, which is 4GB).
Over time I started to collect various old SCSI hard disks, mainly by grabbing any that appeared cheap on ebay (and by 'cheap', I set myself a limit of less than £30 per disk).
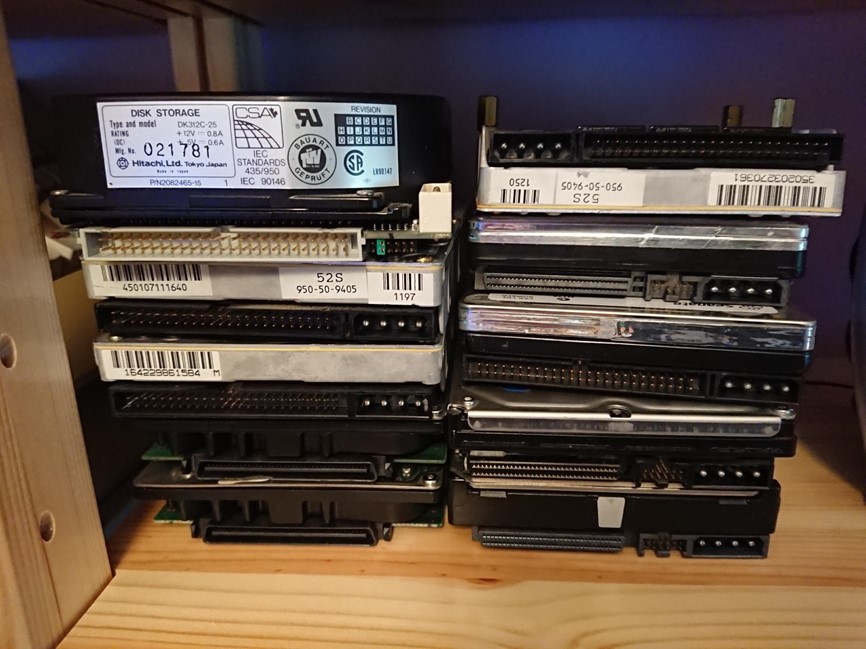
During the decades of fiddling with random bits of computer kit, I had already amassed a box full of various SCSI cables, connectors, and converters Therefore, technically, each of the SCSI disks I bought could be connected to the GVP, one way or another.
Some disks worked, and some didn't. Some even worked perfectly 'for a bit' and then stopped working. Some would partition and format fine but refuse to boot, and some would just sit there declaring they were zero MBs in size.
I can be very stubborn, but eventually, I had to admit defeat. I had to accept that these lovely, noisy, spinning bits of nostalgic rust were just becoming a massive time sink, and I had a long list of other Amiga-related projects I wanted to get on with.
I'd already read up on Gimon's original RaSCSI (since forked as PiSCSI on Github), which is an adapter for the Raspberry Pi to enable it to present file-based SCSI 'device-images' to any standard SCSI controller over the GPIO pins. But having a powerful Raspberry Pi acting as a 'dumb' SCSI device chain just didn't sit well with me. Also, it takes an age to boot up, which can be an issue if you have to hard reset your Amiga frequently.
The main alternatives to RaSCSI are microcontroller and FPGA-based boards, which store the SCSI devices as file images on a FAT32 SD card; two of the most popular are SCSI2SD and BlueSCSI. SCSI2SD is really expensive these days, and BlueSCSI is quite slow in operation (<1MB/s), so those weren't really an option.
I finally found a newer adapter called ZuluSCSI that is based on the SCSI2SD design but uses the RP2040 Microcontroller. I ordered one, followed the instructions and installed it into the GVP expansion unit with an 8GB SD card formatted to FAT32. On the card is a blank file of 3.9GB in size, named HD0.img.
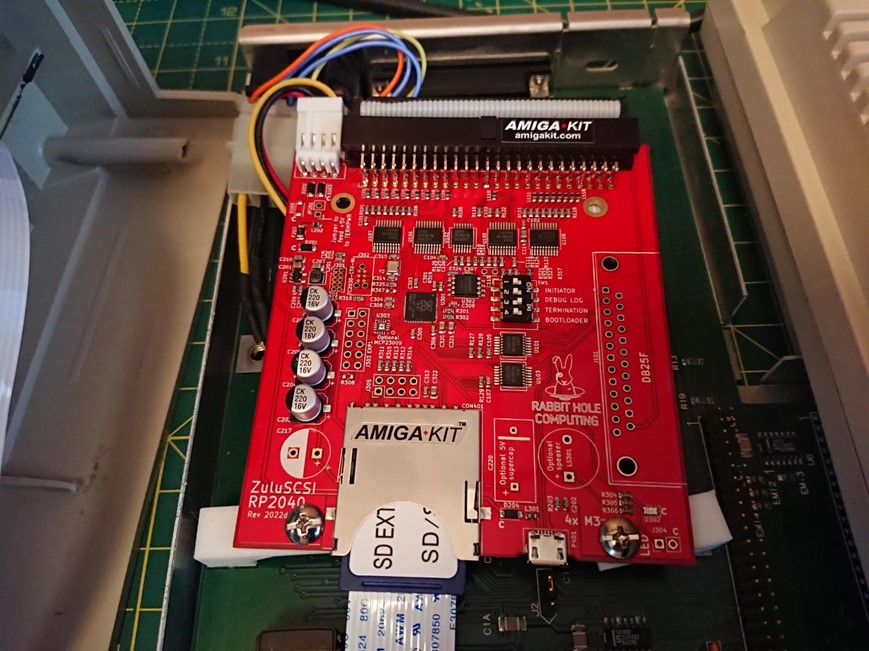
(Shown here with an SD card extender cable inserted, and some dodgy quick-3d-printed supports for the card.)
The ZuluSCSI comes with a 'floppy drive' style power connector, so I needed to solder up a short adapter cable for the GVPs HDD MOLEX power cable.
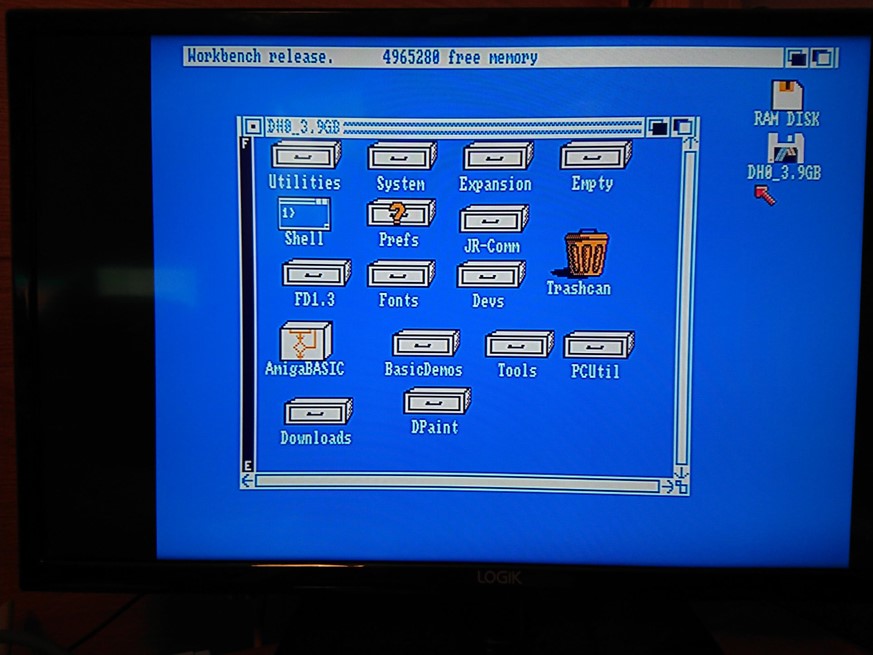
The GVP FaastPrep (not a typo!) software on the Amiga saw the HD0.img file as SCSI Device ID 0 and allowed me to partition it as a single partition and format it with FFS. After copying Workbench 1.3 and the contents of the Extras disk onto it, I rebooted the Amiga, and it booted seamlessly into Workbench from the ZuluSCSI.
Things I noticed with the ZuluSCSI (connected to the GVP): The GVP holds the Amiga in a 'reset' state until the ZuluSCSI firmware has booted up, which can take about 5 seconds. After which, the GVP does its thing and the Amiga boots. With a traditional SCSI hard disk, there is no initial delay. The LED on the ZuluSCSI is just for SCSI 'bus' activity – there is no way to show individual 'device' access. The GVPs activity LED flashes at the same time as the ZuluSCSI one does. The Maximum speed I am currently getting on the Amiga 500 (according to SysInfo's SCSI speed test) is about 1.6MB/s. Which isn't as fast as I'd hoped. I know the GVP and the Amiga can do faster with proper disks, so I'm wondering if it's the speed of the SD card or a limitation of the ZuluSCSI?
Finally, on the GVP, there are some double solder pads (CN6 and CN5) which can be bridged (not to each other!) which allows the GVP to be directly powered by the Amigas expansion bus, eliminating the need for the additional power brick. As I'm using a converted ATX power supply for my main Amiga power, and the ZuluSCSI draws hardly any power compared to a spinning disk, I did this modification and can confirm it works perfectly. If you try this mod, it's at your own risk – I used a multimeter to triple-check the power routing on the GVP, as I wasn't going to trust the word of a random person on the internet who posted this mod originally. GVPs are very expensive and rare these days, so killing one would be quite unfortunate (I do have another dead GVP in a drawer, but that's a story for another time!).
The ZuluSCSI also allows for standard CD-ROM ISO files to be put on the SD card. You name the file CDx.ISO, where the 'x' is the SCSI ID you want the 'drive' to appear as. Workbench 1.3 DOES NOT natively support CD-ROM drives, but after a bit of internet hunting, I finally got it working… the details of how… will be something I shall write up in another post.
So here I am, finally with an unmodified Amiga 500, running Kickstart 1.3, booting from a 3.9GB SCSI drive, and I'm very happy. As much as I want period-correct retro computing, I guess I just have to accept that some things, like old SCSI hard disks, are just too much hassle to bother with.
Anyway, thanks for reading! This is my first post in a brand-new blog, and I hope to be posting more articles in the future!